Pages

Friday, December 28, 2012

Day 16 (Christmas Break)

  Hey everyone! I hope y'all had a Merry Christmas (or whichever holiday you celebrated) and got some time with the ones you love. 

So I updated the Home Management Binder post with links to all of the printable that I did not create, so check it out if you are interested. I apologize for the break in writing, I was enjoying my family time together over the holidays and then started working towards finishing my life story (My Life Story and Testimony) since then. Here are some photos from our holiday break:


I created this shape and added them to the gifts as tags.


These were our gifts to our neighbor. 

This is Loreli leaving their house after ding-dong ditching. :)
... and running slowly away.. LOL!

I am down 2 jean sizes!
Yay!
Getting her ears pierced @ Claire's... She was so nervous!
Loreli loves Hello Kitty anything!
I know it is blurry, but I really liked this one. :)
After Santa struck our home... He also left a thank-you note!


We made this sign and still need to fill in the lettering but we needed something to hang the stocking on. 
This was one of the gifts I got for Jeremy from Etsy.  He loved it!


I would have been on here yesterday but my little man got his fingers cut on some glass at the end of the work day so we rushed to the emergency room. He ended up getting "dermabond" put on it with some extra bandaging to keep it closed and allow it to heal without the risk of infection. He is doing better today. :) He met a girl who was a month younger than him while we were there and they seemed to kind of hit it off. 


This is Connor checking Bailey out. 

Can you see his bandaging? Poor little guy :(


Well, New Year's is coming up quick, and I am so excited to see what God has in store for our family this coming year! We are on the move, and thanks to an incentive program our town is starting, we may be able to open up a physical shop downtown. The landlord of my office was just in here telling me that he will have a historic building ready in about 6 months time, the upstairs being a loft (5,000 square feet with 6 bedrooms) and in our price range, but also will have the downstairs occupied by several businesses, with a couple opening still available. :) I have always wanted to live in a historic building and possibly having my own shop below would be awesome!!!!! Pray for us, please!


~Jen

Wednesday, December 19, 2012

Day 7 (Baked Corn Dog Bites)

Here is another recipe we have added to our list of favorites!


These little nuggets of goodness require the following: 

1 box Jiffy Corn Muffin mix
1/3 cup milk
1 egg
5 hot dogs (cut up into small pieces)
EVOO or Pam cooking spray
1 mini muffin tin

**Could probably stand for a tiny bit of local honey to make it smoother**


I doubled the called for ingredients to feed my large family and in the future will make more to flash freeze for quick meals for the kids. They were definitely a hit with the kiddos, so it will be a repeat recipe. 

Combine the milk, egg and muffin mix in a medium bowl and mix until well blended. Mix in the pieces of hot dog and fold in until mixed well. 


GREASE your pan!


I love my Pampered Chef cookie scooper so I use it for everything! Spoon out small globs of this mixture into the GREASED muffin tin., being careful not to overfill since these will definitely rise and overflow.


Make sure to grease your pan very well so you can avoid the mess I had when I made the first batch of these... it was not pretty. 


But here is what it should look like.


Place them in the oven (preheated to 400 degrees) and bake for about 10-15 minutes or until golden brown and a toothpick comes out clean. 

If you greased your pan, they should come out and leave this behind: 


My little one was a huge fan! The older kids used ketchup, BBQ sauce, and mustard for dipping. :)


Here is the leftovers that are still pretty:


Enjoy!!!


Tuesday, December 18, 2012

Christmas Card to the readers :)

Copy and paste the link below into your web address bar and you will get a special treat!

http://smilebox.com/playBlog/4d7a51304e444d304f44633d0d0a&blogview=true

Thanks everyone!

Day 6 (Low-Cal Pumpkin Muffins)


Y'all, I am so excited to have found one of the easiest breakfast recipes ever, and it is low-cal! I saw these on Pinterest and thought it would be neat to try since I have a leftover can of pumpkin puree from Thanksgiving. 

 These are so quick and only take two ingredients. 


1 box yellow cake mix & 1- 14.5 oz can solid pumpkin puree. That's it!

I know you are not believing me right now, but I promise you this is all I used to make these yummy muffins!
So you combine the box of yellow cake mix and the can of pumpkin puree.
 **I made the mistake of thinking the flour bubbles would bake out, but to help you out, if you have lumps of cake mix that are not mixing in, use a hand mixer. They don't fix themselves. :)

Make sure to grease your cupcake pan so you don't get messed up muffins later and then fill each cup to the brim. They will rise, but not too bad so don't worry about overflow. 

Follow baking instructions according to the box for cupcakes, but check about 5 minutes before that to make sure you don't have burnt muffins. :)

Ta Da!!!!!


 These are super easy and so yummy! My whole family enjoyed them this morning, even the picky eaters!

Recipe:
1 box yellow cake mix (I used Duncan Hines, but any will work)
1- 14.5 oz can pumpkin puree
1 cupcake pan
EVOO or Pam cooking spray

Preheat oven to 350 degrees. Mix both ingredients in a medium bowl with a spatula. DO NOT add any wet ingredients (it will seem too thick, but it works). If there are cake mix lumps left after mixing, use a hand mixer to smooth out. Spoon balls of mix into greased cupcake pan. Whatever shape you see in the pan is what will come out of the oven. Bake according to cake mix instructions for cupcakes (roughly 20-30 minutes) or until toothpick comes out clean. Enjoy!

Variations: You could add some white chocolate chips, pecans, or raisins if you'd like. I don't recommend adding much since they turn out delish on their own, but it's your taste, obviously. 


Day 5 (Home Management Binder)

Okay, so I am finally posting this. I am still not happy with this and will be editing it once I am happy with mine but I keep promising it, so here it is. 

I will include a link with each printable I got from anyone else with the pictures, but they are all 100% free. 

To start, let me tell you a little about what I have included in my binder and why. 

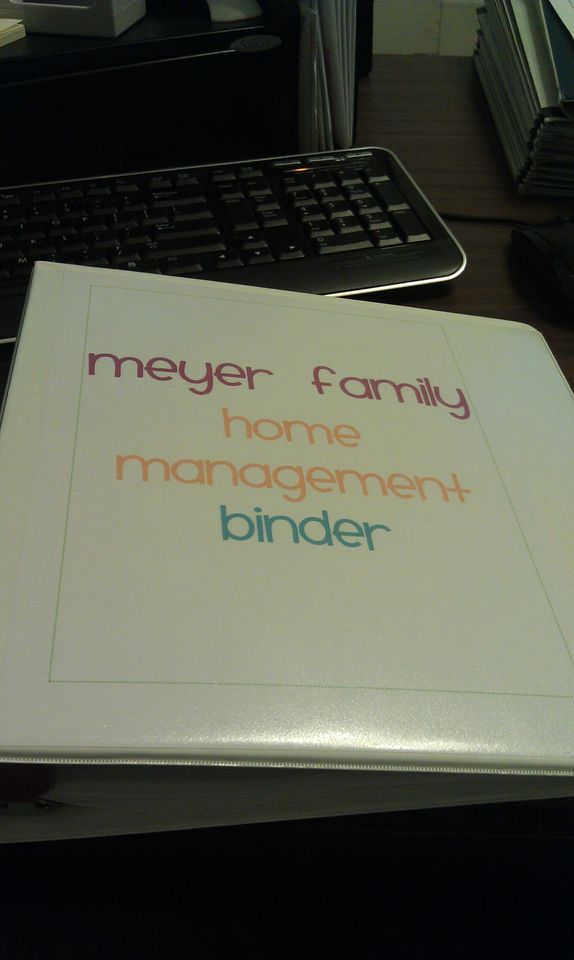
I will eventually make a cute fabric cover to hide the ugliness of the plain white binder. Seriously, I will. I already have the fabric in my office waiting. But in the mean time, I have a printable I got from . It is customizable to your liking, and again, FREE. I like FREE. :)


Cute, right? 

Under the Schedules tab, you will see the Daily Time Manager Section. I have about 2 weeks worth of these at a time and will refill as needed, but these will help me better manage my time so I can be more productive. This is the most detailed part of our scheduling. Here is where I got these: _________________________________


You can see how they are intended to be used (as instructed from the originator). I love this one!

Then we move onto my own creation... the week at a glance pages, which allow me to jot down any appointments or basic things for scheduling to keep in mind while filling in the Daily Time Managers. 


I also created a monthly calendar in the same style as the weekly calendar as you can see below. :)


Following the monthly calendar, I have a Special Dates Reminder I found at ___________________


I liked some more of the printables I found at ________________________________ and chose to use the Monthly Zones to do list for cleaning the house...


 as well as the Auto Maintenance Log...


 and the Household Projects Planner...


I chose to have the second tab in the binder be my Money tab. To start, I use the Annual Bill Schedule as shown below to show me the bills that are due each month and keep track to make sure they have been paid. This will help to avoid any missed payments since you mark each off as it is paid.


I am using my personalized Monthly Budget Worksheet after that to go over a rough breakdown of our household finances for an entire month....
Followed by the Weekly Budget Breakdown as shown. since we get paychecks every week between the two of us. It helps us break everything down into our envelope system (like Dave Ramsey) and make sure we are more disciplined with the money we have.


The third tab in our HMB is the Contacts tab. Inside you will find the following self-explanatory pages (respectively, Utilities Tracker, Usernames and Passwords Log, School Contact Sheets for each child,  Medical & Health Insurance Contact Sheet, and the Family & Friends Contact Sheets.):
http://printables.yourway.net/home-management-notebook/


The last tab in our HMB is the Food tab. First I have the meal planner, as shown. I love this one because it gives me the spot to list out the main dishes for the week as well as an individual box for each day to break it all down. I like to write down the ingredients required for each recipe planning to be used on the back of this page and use it to check my kitchen inventory. I cross out anything I do not need and then move on to making an organized grocery list from that. I got the printable for this one here: http://www.artsyfartsymama.com/2012/01/lets-get-organized-printable.html


Last but not least is the Recipes to Try sheet, where I can write down the ones I found online or in a book and where I found it so I can easily find it again and use it.


Here are the links for all of the printables I did not create 


If you would like a budgeting printable or calendar as featured (my own creations), email me and I will send you a PDF version that you can download and print as many times as you wish. I have monthly calendars in single-page and two-page form as well as weekly calendars in two-page form. For the budget printable, I have it in weekly and in monthly versions. These are free for the taking!

Enjoy your organizing!